Illustrator, Tutorials
Illustrator Tutorial: How To Use Gradients
This post first appeared on www.vickiwenderlich.com.
Program: Illustrator CS4
Skill Level: Beginner
Applying gradients is a great way to give your artwork depth or create a three-dimensional look. This beginner tutorial will walk you through two methods to apply gradients in Adobe Illustrator while showing you how to create a cute fish!

You can either follow along with the tutorial to create the fish, or download an Illustrator file with the fish shapes already made and skip ahead to Part 2.
Part 1: Create the Fish
Note: in order to follow this part of the tutorial, you must know how to use the Pen tool! If you aren’t comfortable with the Pen tool, go through this 3-part tutorial: How To Use The Pen Tool in Illustrator.
Open a new document. It doesn’t matter what size the artboard is, but mine is 700 x 480 pixels.

For the fish colors, I used two shades of blue from the default swatches in the Swatches panel.
Make The Fish Body
Use the Pen tool (type P or select it from the Toolbox) to create a fish body shape similar to the one shown below. Select the fill in the Appearance panel and click the lighter blue in the Swatches panel to make the fill blue.
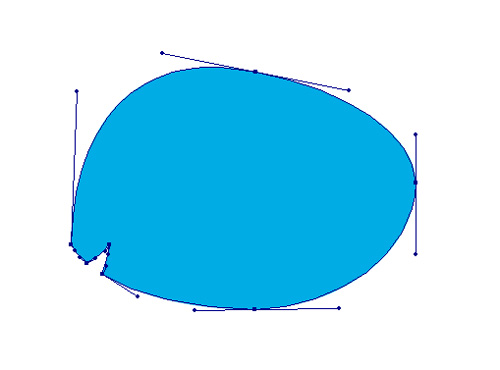
Make The Fish Tail
Next, still using the pen tool, create the fish tail. Select the fill in the Appearance panel and click the darker blue in the Swatches panel.
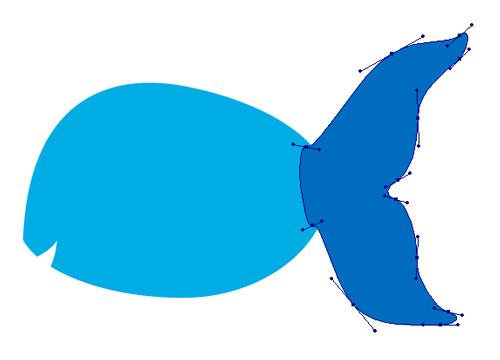
Change The Layer Order
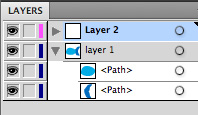
Drag the tail shape below the body shape in the Layers panel.
Create The Top Fin
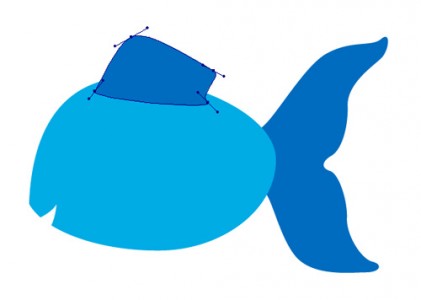
Make a top fin and drag it below the body in the Layers panel.
Make The Eye
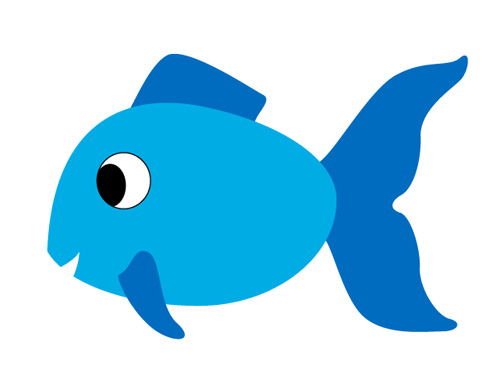
Select the Ellipse tool (or type L) and drag out an oval for the eye.
Make it into an eye using my Awesome Easy Eyeball method.
Make Three Bubbles
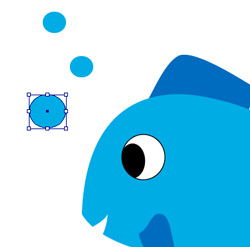
Drag out three circles for bubbles. Press Shift as you drag out the ellipse to create a circle.
Select the fill of each bubble in the appearance panel and click the lighter blue.
Now we will start applying gradients to bring this fish to life! Here’s what he looks like so far:

Part Two: Applying The Gradients
There are two methods you can use to apply gradients.
1) Layer a black or white gradient fade fill over a plain color fill.
This method is best for development when you might have to change colors later. For example, if you have not decided yet on a final color scheme. With this method, you can alter the base color in seconds while keeping the gradient shading intact.
2) Apply an opaque gradient fill that goes from one color to another color.
This method makes it more tedious to change if you decide you want the object to be another color entirely, but it can often result in richer, more attractive colors.
Most of the time, I use method one, and only switch to method two if method one is not giving me the look I want.
Method One: Apply a black or white gradient fade over a color fill
Add A New Fill
Select the fish body in the Layers panel (or hit V to choose the direct selection tool and click on the fish body).
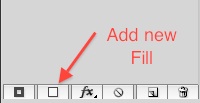
Go to the Appearance panel. Select the blue fill. Click the New Fill icon.
Open The Gradient Fades Swatch Library
Go to the Swatches panel.
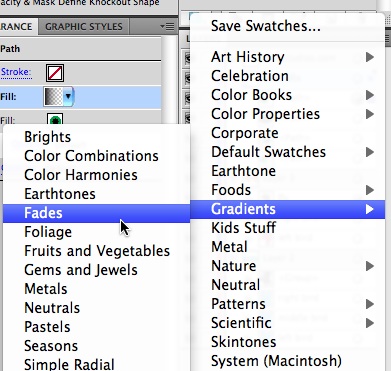
Click the Swatch Libraries Menu icon (in the lower left corner of the Swatches panel) to open the Swatch Libraries.
Choose Gradients>Fades from the menu.
Edit The Color Stops
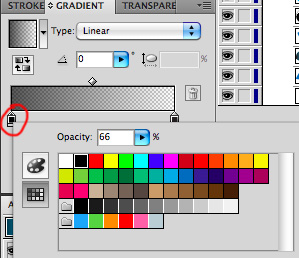
Go to the Gradient panel.Doubleclick the left color stop to bring up its options.
Currently the color is not true black (for some reason it’s a muddy grey).
Click on the Swatches icon to the left of the option dialog to show the swatches rather than the color mixer. Choose the black swatch.
Also, lower the opacity of the color stop to somewhere around 66%.
Save this gradient to your Swatches panel by either clicking on the thumbnail in the top left of the Gradient panel and dragging it over to the Swatches panel, or by clicking the dropdown arrow next to the thumbnail and clicking the Save To Swatches Library icon.
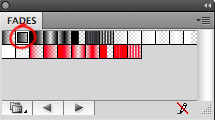
Currently the Gradient Type is Linear. Click the dropdown menu next to Type and change it to Radial.Next, click the Reverse Gradient icon (circled in red below) to make the fully transparent portion in the center.
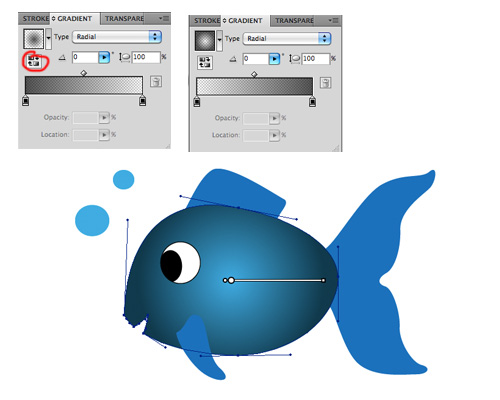
Click G to use the Gradient tool. This allows you to edit the gradient directly on the screen. If the Gradient Annotator does not come up, make sure you have the gradient fill of your fish body selected in the Appearance panel.Drag the black diamond at the end of the gradient to change the gradient size. Drag the bar with the color stops to change the gradient location. Click on the inner color stop (the black with opacity of 0%) and drag it to the right so that a larger region is fully transparent.
Click on the black circle (at the top of the dotted gradient circle) and drag it down to make the gradient ellipse thinner.
Move the gradient and color stops until the fish has a nice shading towards the bottom of its body, as shown below.
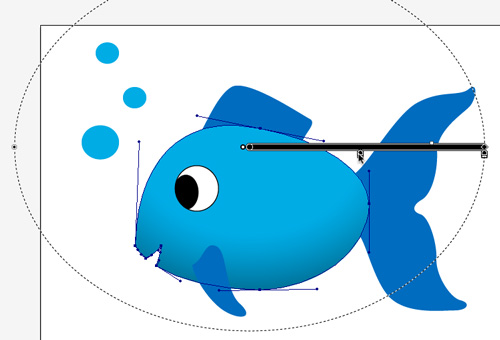
Now for the bubbles! These get a white to transparent radial gradient.Select the largest bubble. Go to the Appearance panel and add a new fill.
Go to the Gradient Fades panel and choose Fade To White 2.
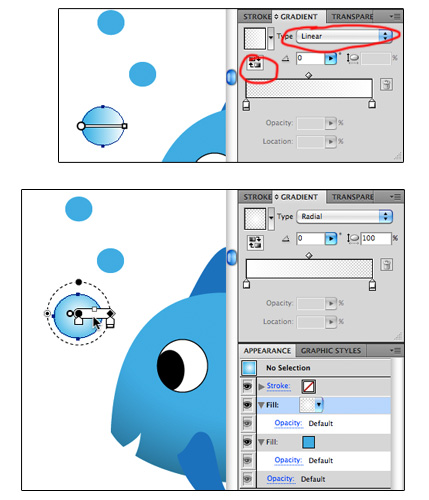
Change the Gradient Type to Radial.
Click the Reverse Gradient icon so that the spot of white is in the center.
Move and resize the gradient a bit so that it looks like a bubble highlight.
Copy The Layer Appearance To The Remaining Bubbles
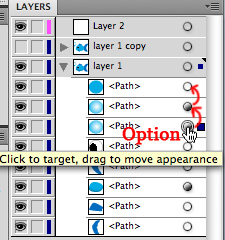
Go to the Layers panel.
See the circle to the right of the bubble to which you just finished adding a gradient?
Click the circle while pressing Option (Alt) and drag up to the other bubble’s empty circles.
This copies the appearance of the first bubble to the other bubbles.
Method Two: Apply a color gradient
For the fins, we will try out the second method of using gradients.
Select the upper fin in the Layers panel (or hit V to choose the direct selection tool and click on the upper fin).
Go to the Appearance panel. Select the blue fill.
Create A Blue Gradient
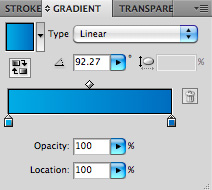
Go to the Gradient panel. Click the thumbnail (it doesn’t matter what it shows right now, but it’s usually the last gradient you used).
Doubleclick the left color stop and change it to the light blue with 100% opacity. Doubleclick the right stop and change it to the dark blue with 100% opacity.
Save this gradient to your Swatches panel.
Position The Gradient
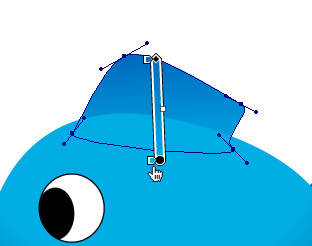
Type G to use the Gradient tool.
Click and drag over your upper fin to create the gradient size and direction.
Apply Gradient To Tail Fin
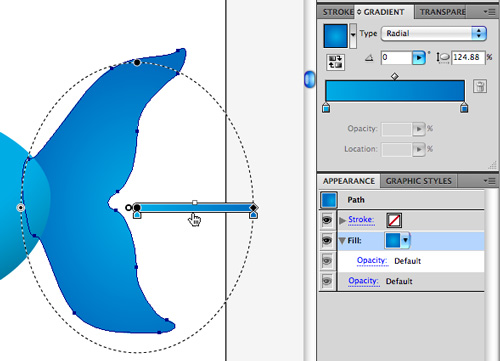
Select the tail fin by using the direct selection tool (shortcut V), and select the blue fill in the Appearance panel.
Change the fill to your blue gradient by clicking the blue gradient swatch in your Swatches panel.
Change the Gradient Type to Radial.
Type G to use the Gradient tool and edit the gradient’s position by dragging the gradient bar. Make it an ellipse by dragging the black circle at the top of the dotted perimeter upwards.
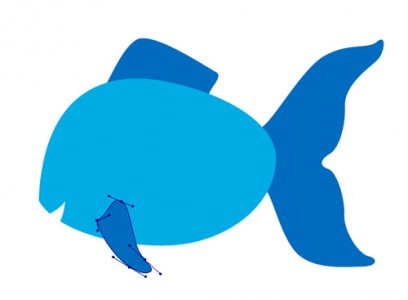
Apply Gradient To Lower Fin
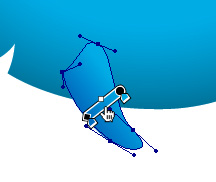
Select the lower fin by using the direct selection tool (shortcut V), and select the blue fill in the Appearance panel.
Change it to the blue gradient by clicking your blue gradient swatch in the Swatches panel.
Type G to use the Gradient tool. Click and drag over the fin to position the gradient.
Method One vs. Method Two
Now you will see the effects of each method on further editing.
You can easily change the body of the fish to a different color. Select the body using the direct selection tool, and select the blue fill in the Appearance panel.
Click another swatch to change the base color of the fish body. Done.

Changing the fin colors would be more time-consuming, since you would need to create a new gradient with the color stops of your choice, and apply the new gradient to each fin.
However, you will notice that for this fish, the blue gradient looks a little nicer than the blue base with a black transparent overlay.
Both methods are useful to know – sometimes you need things fast, or you don’t know what your color scheme is yet, or the objects/characters look better with the gradient fades over a base color. Sometimes you need gradients with specific color stops.
Now you know how to do both!
If you have questions, comments, or more gradient tips, share them below in the comments!




I don’t have CS5 yet, and CS3 works a bit differently, so I can’t try this myself… but if you can set that black and white gradient to be “Overlay”, then you’d get a really nice bright blend of colours. Maybe in the Appearance tab, where it says “Opacity: Default”… what happens when you click on that? Can you change it to overlay there?
These new gradient controls are making it even more tempting to upgrade. Thanks for the tutorial! :)
Yes, you can set a Fill to Overlay either in the Appearance panel where it says Opacity, or in the Transparency tab.
Overlay does give a nice bright blend of colors with the black and white gradient, I need to explore that some more!
Yes, it’s a great (read: easy) way to add some nice rich depth to almost anything. Most buttons on the web start with a solid fill with a b/w gradient over it, set to Overlay.