This post first appeared on www.vickiwenderlich.com.
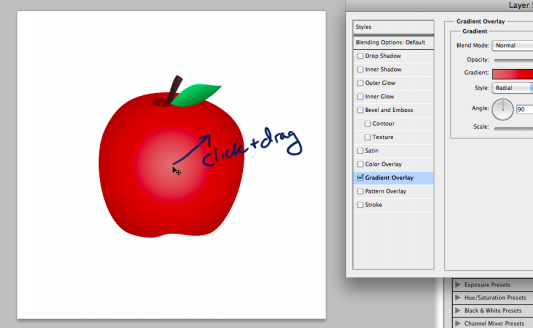
When you apply a Gradient Overlay Layer Style, you can set the color stops at the beginning and end of the gradient. You can change its style, angle, and scale in the Layer Styles dialog box.
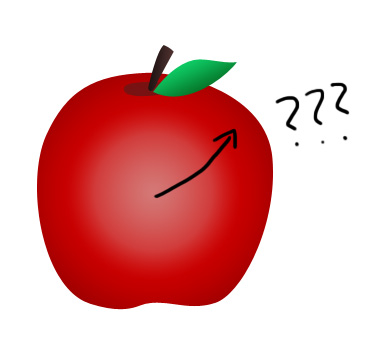
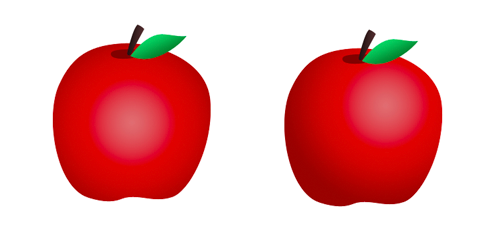
But what if you want to move the gradient? For example, on the apple below, we want the radial gradient to have its center point in the upper right, rather than in the middle.

Here’s what you do: when in the Layer Effects dialog, mouse over to your object with the gradient. Notice that your cursor now has little up-down-right-left arrows. Click and drag.

Yup, it’s that easy.
For a long time I thought moving the gradient was just not allowed for some reason. There is no control for it in the Layer Styles dialog. My tutorial book seemed to think it was obvious and missed imparting the mechanism to me. It drove me bonkers for months because I never noticed my mouse changing when I accidentally moused over to the object to which I was applying the Gradient Overlay Layer Style.
Once I figured it out, I never thought about it again until recently a friend was struggling to do the same exact thing. So hopefully this tip saves someone else hours of frustration!

What are some other tricks you’ve come across that are so simple but so important? Leave them below in the comments!


Thanks for the tip.
It’s amazing how such little tweaks like that can add a real professional finish.
Photoshop is such a deep product with all these tips and tricks to master!
I just did an experiment adding a radial gradient to a square box and then moving it to the corner to get a much more polished highlight effect – so much easier thanks again!!!
+1
twitter : @whitetree_games
Great tutorial.
I’m trying to create shapes in Photoshop using some of their predefined shapes. Do you know how to remove the square border around the shape? I’ve tried different ways to get rid of it, but haven’t had any luck. If you know or have any suggestions, I’d appreciate it.
Hi Annette,
Can you tell me exactly how you created the shape and got the square border? I made a shape (one of PS’s predefined ones, a paw print), but it just came up as a vector shape with the selected color inside, no square border. Tell me which shape you used and I will try to figure it out.
I used the cupcake shape. I opened a 64×64 pixel size window, 72 pixel resolution. I used the paint bucket to color the background then I selected the cupcake from the shape list. I’m using Photoshop Elements.
Thanks very much.
Okay, I think I know what is going on, although I don’t have PS Elements and I couldn’t reproduce it on my computer. After you create the shape, click “simplify” to remove the border around it. I got that info from this site, most of the way down the page.
Let me know if that fixes it!
Vicki,
Thanks for the link and info. I haven’t gotten it to work yet. Sometimes the simplify command is grayed out, but when I am able to click it, I still get the border. I’m missing something. I’m going to take a break from it and try it again in a day or two when I’ve got a fresh perspective.
Thanks for your help.
I got it to work! It was a combination of how I created the image but also how my code was written to display it.
Thanks so much for your time and help!
Ah, good, I’m glad you figured it out!
Thank you.