Illustrator, Tutorials
Save Time Resizing Art With An Illustrator Action
This post first appeared on www.vickiwenderlich.com
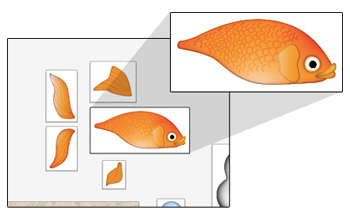
With the new iPad retina screen, developers will need to upgrade their iPad (or universal) apps with art that is double the pixel size of the original.
If you made your art in Illustrator, this is not a big cause for alarm. Since Illustrator is a vector-based program, resizing the art will not result in blurry graphics.
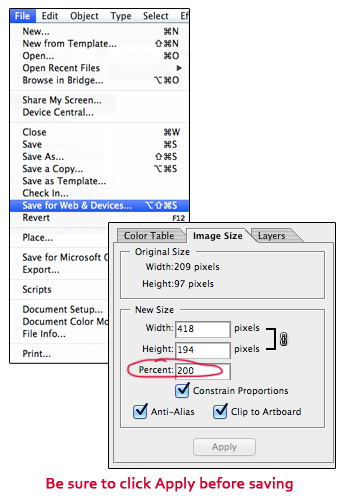
In fact, all you need to do is Save For Web & Devices as usual, then go to the Image Size tab, change the percent to 200, click Apply, and save.
Unfortunately, if you have a lot of images even this simple step takes a LOT of time.
There is a way to speed up the process somewhat using an action. Actions are simply recordings of a set of commands or events. Once you create an action, you can play it to apply those commands and events to a piece of art.
Read on to find out how to make an action to save out Illustrator art at double the size!
Step 1: Record The Action
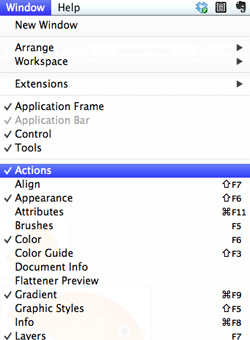
First, open the actions panel.To do this, go up to Window and choose Actions.
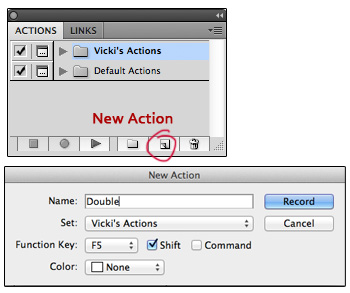
Next, click the New Action button at the bottom of the panel.Name it “Double”.
Set a function key that will trigger the action – I chose F5.
You can also add a modifier key like Shift or Command by clicking its box.
Click OK.
The action is now recording everything you do, like an angry ex-girlfriend. But more useful.Click on the artboard of the image you want to resize.
Go to File > Save For Web & Devices.
Click the Image Size tab, change the percent to 200, and click Apply.
Make sure any other settings are as you want them; if you are saving out iOS art, you will want PNG-24 with Transparency checked.
Click Save.
Navigate to the folder you want to save the art to. The action will save all future art to this specific folder, so keep that in mind.
Name it and click Save.
Step 2: Stop Recording
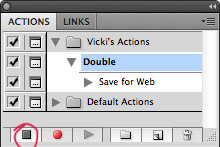
I often forget this, but it’s an important step: click the square at the bottom left to stop recording!If you don’t, and you run the action, it will ultimately give you an error message.
Step 3: Use The Action
Now click on the next artboard of the next image you need to resize and save.Press F5 to play the action. You can also play the action by double-clicking its name in the Actions panel, or by clicking it and pressing the “Play” icon at the bottom.
It will Save For Web & Devices and resize the art to 200% automatically, but you still have to click Save.
Name the file and click Save again.
This action only shaves a few seconds off the saving process, but when you have dozens or hundreds of images to resize, trust me – it’s worth it!
Problems I’ve Noticed
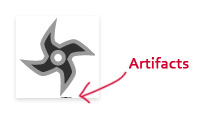
I have seen one problem that only occasionally happens when saving this way: every once in a while, the image that is saved has odd artifacts along the bottom or right edge.You can just open these particular PNGs in Photoshop, delete the artifacts, and save.
Know Another Saving Tip?
If you know of a better way to do this, or have other tips to help resizing and saving art, please add your voice in the comments!


Good grief. I can’t believe I didn’t know about the “Image Size” tab until now. THANKS for the tip!!
Haha you are welcome!
nice one! save time for sure.
would be nice if option to add “-hd” as well before saving ;)
I use Name Mangler (MAS link: http://itunes.apple.com/ca/app/name-mangler/id402434720?mt=12) to append things to file names like @2x, etc. You can create a droplet, stick it in your dock, and it’ll append whatever preset text you want to any file that gets dropped on it. Super handy.
Muuuuchas gracias Vicki ! ;)