Oct
This post first appeared on www.vickiwenderlich.com
Let’s say you are making a game on a budget, and have found some free art somewhere (like on this site).
Great! But often the free art is somewhat limited – you can’t really choose if you want an orange snake or a green snake, or if your robot has a blue head or a green head.
Wouldn’t it be nice if you knew how to recolor the artwork so that you can have a bit more variety?
Well, read on to find out a few easy ways to do this in Photoshop! Which option you choose will depend on the artwork you are trying to recolor and the effect you are trying to get – if one doesn’t get the results you want, try another!
Download the files for this tutorial here – includes several PNGs and a PSD file.
1. Color Overlay
The simplest method is a color overlay, which is a layer style. It is super easy to apply and is non-destructive (which is a fancy way of saying you can change it or take it off whenever you want).
Open your image (here, we are using snake.png).

Double-click on the layer in your Layers palette to bring up the Layer Styles. Click Color Overlay.
The default is usually red with a Normal blending mode – almost never ever what you want!

Click the Blending Mode and choose Color. Much better already!

Now double click the red color and choose a different color. I chose green. When you are happy with your color, click OK to accept it.

That was fast! Now save your newly tinted snake as a PNG.
Note: You can also choose Hue as your blending mode – it acts slightly differently, and it will change everything except grey tones.
2. Recolor artwork
A color overlay really only works if your image is composed of shades of a single hue. What if your image has several colors, like this dog below?

Let’s say you really want that pillow to be a nice light blue instead. You could try using color overlay, but here’s what happens:

The Color blend mode gets us a blue dog, and the Hue blend mode gives us a pillow that is too dark. So what do we do?
Luckily, Photoshop has a cool feature that allows you to replace one color with another! Let’s try it out:
First, make a duplicate of your layer in case you want to return to the original, since Replace Color is a permanent change. Select the layer and hit Command-J to duplicate it.
Now, with the new layer selected, go to Image>Adjustments>Replace Color.

This brings up the Replace Color dialog. The first thing to do is select the color you want to replace – in this case the red of the pillow. Click somewhere on the red.

See the black-and-white image in the middle of the dialog? The white shows you what you have selected. You can increase the “fuzziness” of the color selection, which means it will select more than just that particular color – it expands the selection to shades of that color, and colors near your selected color. Adjust the fuzziness so that you get most of the pillow.
Now change the Hue by moving the slider. I moved it all the way over to the left to get a bluish color. I also increased the Saturation and the Lightness somewhat. Play around until you get what you want. Then hit OK to accept the change.

Great! Now your dog has a nice blue pillow.
But what if you want the dog to be brown instead?
Well, if you try Replace Color, you will find that it is not possible to replace neutrals like the grey of the dog. So that’s not an option.
Which brings us to our third easy recoloring option: Color Balance.
3. Color Balance
Color Balance is simply an adjustment layer, which means that it is non-destructive and can be changed at any time. I’ve found that it works best on grey tones, but you can use it on other hues as well.
Select your layer and go to the Adjustments palette (if it’s not open go to Window>Adjustments to open it). Select the Color Balance adjustment. It creates an adjustment layer above the rest of your artwork.

Now drag the sliders around until they give you the color you want. Here’s what I ended up with for that nice brown color:

But wait – what did it do to your pretty blue pillow?
What you need to do is have the layer only affect the dog. This means you need to apply a mask. It’s easy and worth the few extra seconds!
Applying A Mask
Look at your adjustment layer in your Layers palette. There should be a white rectangle next to it. This is your current mask, and white means it shows through – which means your adjustment layer is affecting the entire artwork. We want to change this. (If you have no white rectangle, that’s fine – it means the same thing, you can simply skip the first step).
First, delete the current mask: right-click the white rectangle and choose Delete Mask. Now we can apply our own.

Pick the Magic Wand tool – underneath the Quick Selection tool.
Click the dog on his back. See the blinking dotted line? That is your selection. We want the entire dog, so we need to add to the selection. Press and hold Shift, and you will see a small “+” under your cursor. Click on the dog’s head to add to the selection. If you add too much, you can press and hold Option and click to subtract from the selection.

If it’s not selecting much, you can increase the tolerance at the top of the screen so that the selection includes more shades (you need to click again to make the changes take effect). Click around the dog until everything you want is selected. I left the snout and paws unselected.
Make sure your adjustment layer is selected in the Layers palette. Then click the “Add Mask” button at the bottom of the Layers palette. You should see the white rectangle fill with black except for the dog-shaped selection area.

Now our Color Balance layer affects only the dog and leaves our pillow a nice blue!

Practice Challenges:
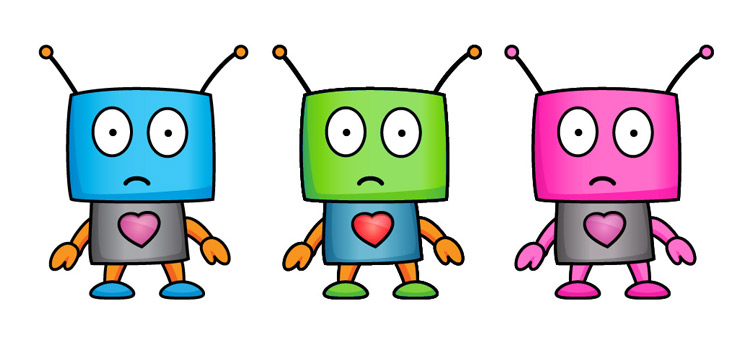
All this knowledge won’t sink in until you practice on your own. Here are a couple of exercises for you to test your skills! Open the file robot_cute.png and try the following:
1) Change the robot to be all shades of pink except for the grey body:

2) Change the original robot to have a green head and shoes, a blue body, and a red heart:

For hints, you can open the file cute robot.psd and see how I changed the color.
Have A Recoloring Tip?
There are a ton of different ways to recolor artwork in Photoshop – I only touched on the three that I consider most useful to non-Photoshop-pros who are looking to recolor PNGs for their game art.
I know there are probably a lot of other little tricks I’m unaware of! If you have a tip for easy ways to recolor artwork, I’d love it if you left it in the comments – it will help both me and other developers.
Happy recoloring!
Thanks for laying it out so clearly. I love the concept of adding new colors!
Vicki,
Great tutorial! I was able to use your tutorial to fumble around and figure out how to do the same tasks using Pixelmator… or at least something close enough. It’s always great to add to my very amateur image editing skills.
You and Ray make a great team.
Thanks again.
Very nice tutorial understanding the layer.
Thank you for share you knowledge.
Very handy tutorial. You are great. Thanks a lot.
Simply Great :)
That’s a most fabulous tutorial. I had no idea this can be done. You made my day :-)
w00t! Glad it helped :]
Nice basic tutorial. I found my way here through your awesome ipad/iphone size markup. You’re such an inspiration giving the community access to your “Free art” section and sharing your knowledge. Keep up the good work!
Btw, I found I often use Hue/Saturation-> Colorize for some cool recoloring effects.
(Image->Adjustments->Hue/Saturation and then click the “Colorize”-checkbox) This works on selections as well.
Thanks again!
Thanks, it’s always nice to hear that the blog is appreciated!
I am kinda new to this and was wondering if you could recommend any free tools?
never mind found some examples in another article
Very helpful tutorials for startups. Thank you very much for this;) I work with photoshop not one year on other fields, but your information still useful and simple understandable.
It’s helpful to use the Photoshop filters, as well, to change the image.
Hi –
Same problem here – images not displayed.
Thanks
Fixed – thanks for the heads up!
The first time, I have learnt something. So easy for me … To be honest I am not good at all in Photoshop … Especially, like the Challenges section. Thanks
Thanks you very much. I found something great and useful. :)