Game Design, Tutorials
Creating 3-Dimensional Characters & Objects: Light Sources
Sep
This post first appeared on www.vickiwenderlich.com.
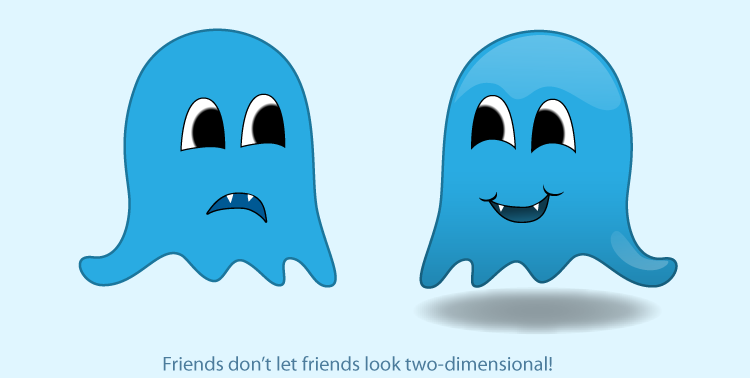
Objects and characters that appear three-dimensional often look more attractive than those with flat, two-dimensional colors. A three-dimensional scene will feel more “real” to users.
Several people have asked how to create a three-dimensional look for their game and app artwork. While it’s not hard, you do have to know what you are doing. Let’s start with the basics!
First, you need to recognize what makes an object look three-dimensional: its highlights and shadows. These highlights and shadows are created by a light source coming from a particular direction. Thus, the first step in making your characters and objects three-dimensional is choosing a light source for your scene.
Object + Light Source = 3 Dimensional
Basically, you take your object, decide where your light source is shining from, and apply highlights and shadows to the object based on where your light source is.

If you don’t know how to do this, don’t panic — that’s what this article is about!
Choose A Light Source
Choosing a light source just means deciding where your imaginary sun or lightbulb is placed. Here are light sources from four different directions, and their effects on objects:

Unless you are creating funky or very stylized art, it’s best to go with one of two choices:
- directly overhead
- overhead, but offset slightly to the right (or left)
Directly Overhead
We humans are used to having objects lit by the sun or light fixture on the ceiling, which is why choosing the light source to be directly overhead is the most common.
Also, it is the most neutral direction for light to come from, which is useful when you have objects (or characters) flipping left to right within the app. If you created a dog character with a light source to one side, you’d have to create entirely new artwork when he turned around and walked the other way or risk creating a contradictory visual scene that will irritate viewers.

Overhead, Slightly Offset
While directly overhead lighting is the most neutral, there are cases where you need more definition from left to right, such as on vertical cylindrical forms (legs, columns). Placing the light source overhead but slightly to the right will allow you to create shading left to right as well as top to bottom.

This, of course, will create a slight contradictory look when the object is flipped. If this is an issue for your game or app, you can either create new art for the flipped version or make the gradients subtle enough that it does not create very much of a visual discord.
You can set the light source slightly to the left as well, but setting it to the right just makes more sense to most people.
In some cases, you can’t do anything to make the object have correct lighting at all times. Don’t worry too much about it. For example, in Wild Fables we have objects that can be thrown around the screen. There is no way to keep the lighting completely consistent, so I create the apple’s shading with its upright position in mind. This is because our eyes are familiar with that shading of an apple. When it is turned upside down, it still looks like an apple even though the shading is “wrong”.

The most important point is this: pick one direction for your light source and stick to it for all your objects and characters. Even if they will rotate and turn, make the lighting consistent for the way they will most commonly be viewed.
In my next post, I will cover how to use our choice of light source to create this three-dimensional look in Illustrator with gradients and vector shading, so stay tuned!
nice write up to make flat looking illustration to be more 3d-ish.
Good stuff :) i’m creating my character now and i’m struggle-ling to get this right, this certainly gave me a better picture. thanks!
This is a great post. Thanks for this.